Faux Braid Headband Pattern

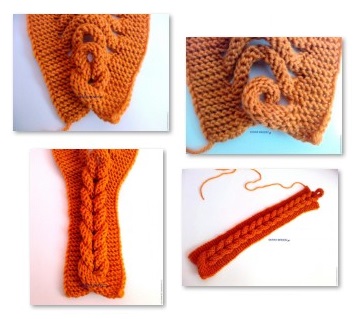
This crochet project is a headband that uses the faux braid technique to achieve its braided look. See that headband above? That’s actually two of the pattern set out here, one atop the other, and each one uses a faux braid — that means it’s not several pieces braided together, it’s actually one crocheted piece with holes, or slits, and the bulk of the headband is tucked into the slits in order to “braid” them.
As far as crochet projects go, this might be a useful one because the faux braid is used in a lot of patterns.
The origins of this pattern are not known. There are Chinese and Russian patterns (Yana Bekkel, who is thought to be the original crocheter behind this headband) for this using the pink/purple crochet headband image (these ones also just outline the single headband which has to be doubled up for the effect of the top image.
But more recently a crafter at Good Knit Kisses, Kristen Mangus, put up a pattern in English, which is what we turn to. She got her inspiration from Denice Johnson.
Hers is a loom knit. It makes a headband 3 inches by 20 inches.
For this DIY crochet project, you will need:
- yarn (medium weight)
- knitting loom
- knitting loom tool
- tapestry needle
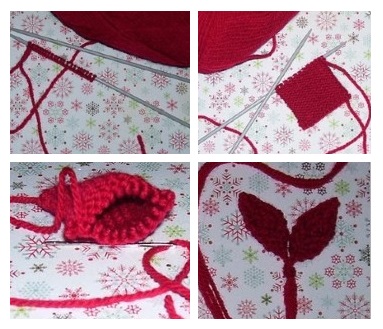
What you will crochet is something like the first image here, and you will poke the cords through the holes (like the other picture). Finally, you have a band with a loop at the end (last picture), and you tuck that loop into the other end to complete the band.
For the Yana original crochet pattern, click here. For the English Kristen pattern, click here.
Crochet Owl Coasters (Free Pattern)

How about these owl appliques?
We saw this photo and had to look into it. What we came up with is 2 crochet sources:
The image at the top is the creation of ‘zoomyummy’ and they are very colorful coaster ideas. Zoomyummy has also offered a $5 pattern for how to make these crochet creations (click here for $5 pattern).

For a free pattern that is somewhat similar, we found “Hooty Owl Coasters” provided as a Google Drive sheet pattern by Moogly Blog (click here to visit them or click here to view the free pattern).
Railway Tie Garden Wall
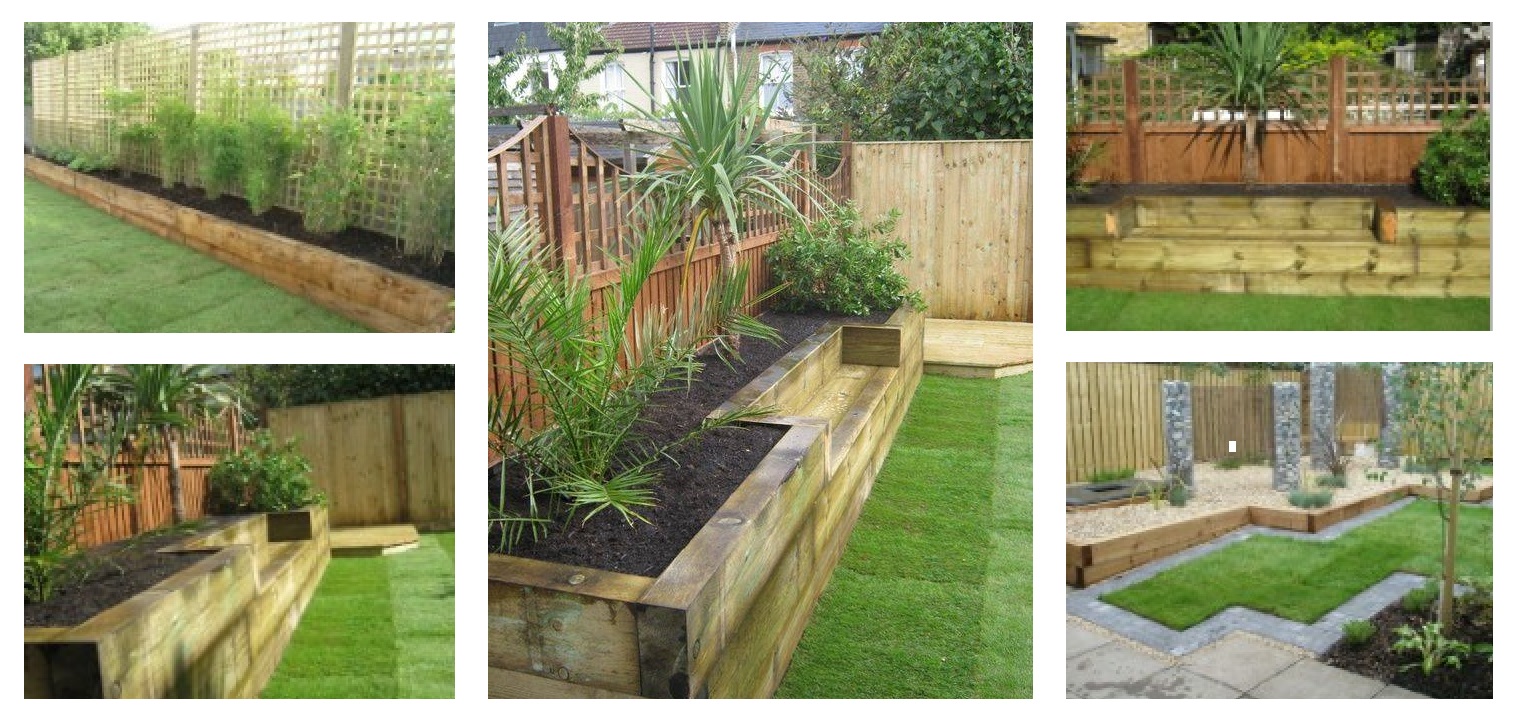
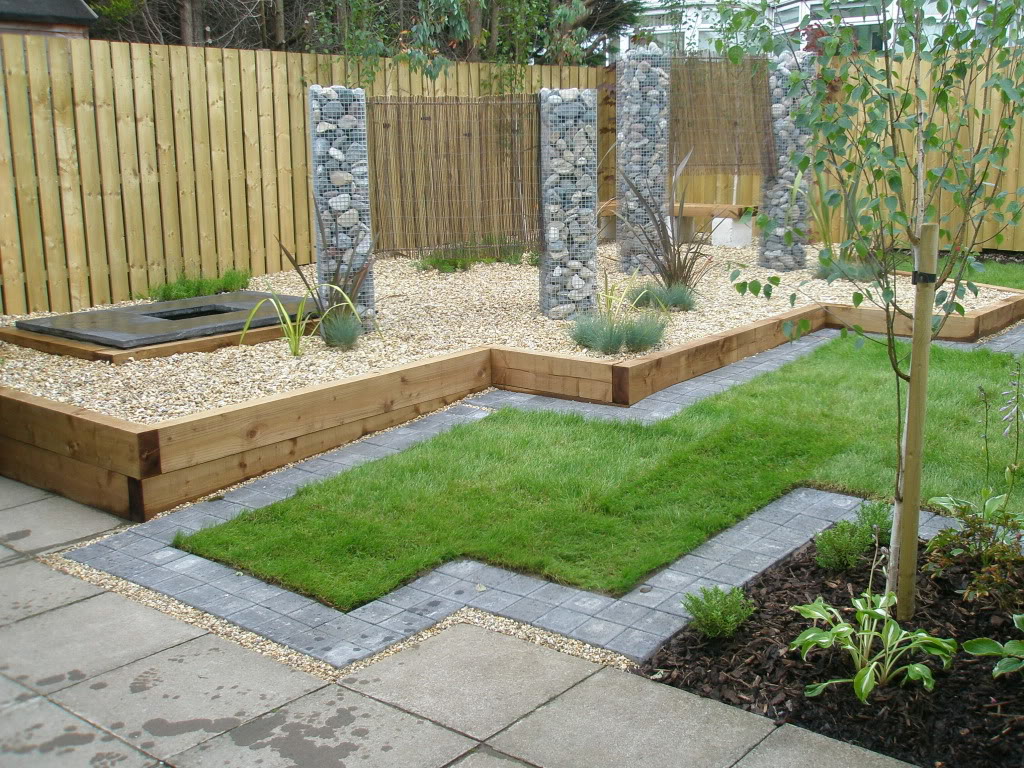
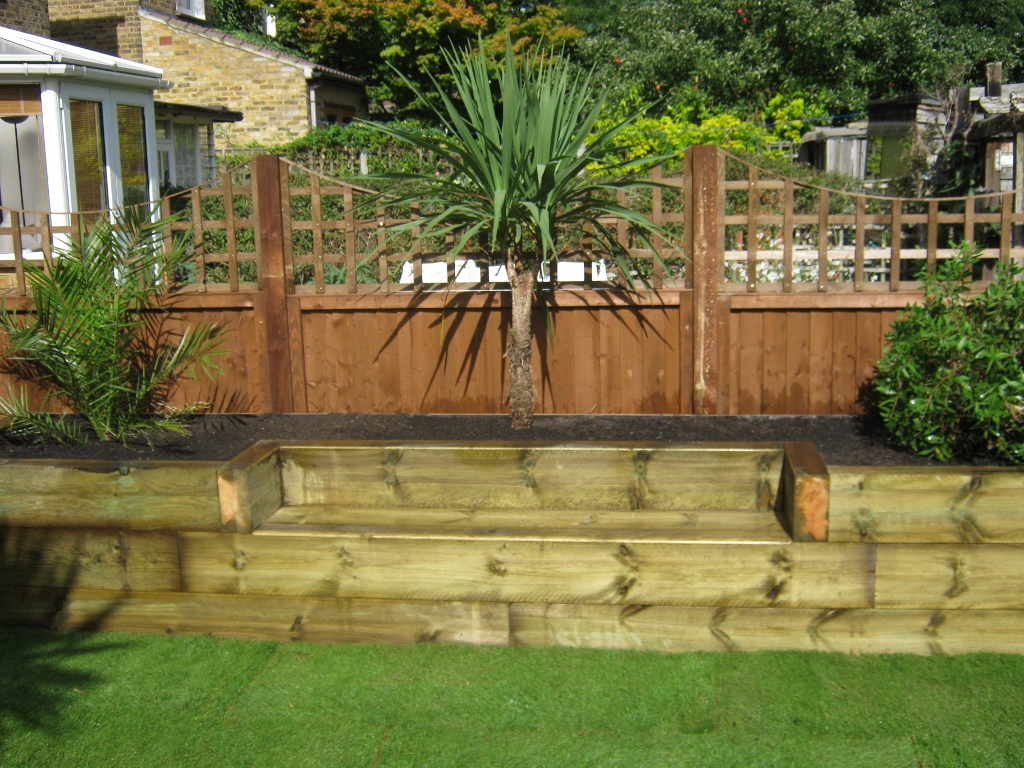
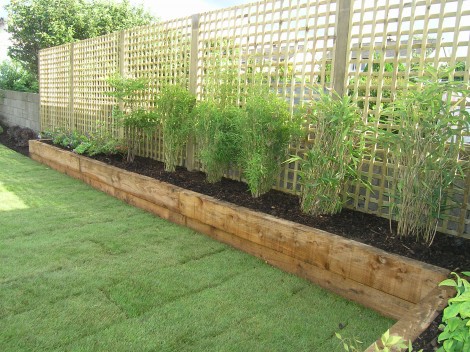
Do you like the look of these railway ties on this garden? It’s a backyard garden, something many people have — you don’t need a huge open space, and they have arranged a load of railway sleepers (these are the crossties used horizontally across the bottom of steel railway tracks, usually half buried in gravel — we call them railway ties in North America, but the British and Australians call them railway sleepers).
Would these look good in your garden? You don’t have to arrange them the way you see in the photo above, although it seems the effect that arrangement has on people is a positive one. We’ve provided a few more garden photo ideas down below. Take a look at this 2 seater patio set too, which is the perfect addition to any calming space.
Railway ties can also make steps for gardens pretty easily. If you want, you don’t need to fix them to anything with nails, stakes or screws — you can just embed them in the earth. When you’re piling them on top of each other, though, it’s better to drill holes and use bolts to tie them together, or drill holes and run (around 4-foot lengths for the a single piece of railway tie) rebar through the railway ties into the earth.
It’s also a quick DIY garden project. One guy who made a 5-step railway tie said it took him about 2 hours.
Railway sleepers cost around $13-20 dollars from building supplies stores in America. You can also buy cracked ones from them which might go for around 75 cents on the dollar. It’s better to spend a bit more money and use good quality railway sleepers so they last longer.
To make something like this, you’ll want to plan it out custom to what you want to build and how much space you have to build it. Then call the hardware store to ask them what lengths you can buy lumber in. Then you’ll start your work by leveling the ground and putting in stakes for your measurements. Your first layer gets holes drilled for the 4-foot rebar stakes that will go through them.
You’ll place gravel under the railway tie in a lot of cases, but not all. If you need to hammer one end down when you lay it to get it level, place a piece of scrap wood on top and hammer it with a sledge hammer.
When you cut your wood, you may want to treat it (the cut — untreated — end) to protect it from weathering.
Usually, your second layer of wood will be staggered — so the ends of the wood don’t line up, but rather you lay them kind of like you would building a log house.
If your construction is going to be tall, like a retaining wall, place a piece of poly on the end you are going to bury, then place a drainage tube on it, cover the pipe with stones, and cover the stones with a filter fabric.
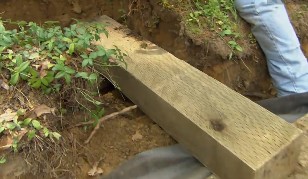
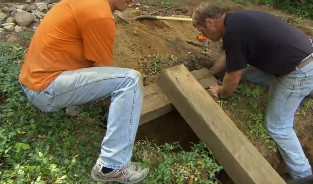
If you’re going quite high, you can use a deadman — two pieces of wood in the shape of a T, which acts like an anchor in the earth. The anchor end is buried in a trench and covered with earth behind the wall, and the naked end is screwed into the wall construction.
Easy Butterflies (Free Pattern)

Crochet DIYers, when you have leftover yarn, what do you do with it? Do you have a bin full of small bound balls of yarn about the size of a cat’s playtoy? You don’t throw them away, right? Because they’ll be good for something someday — some future crochet project. Well, you can use those small scraps of yarn to make small projects, if you just know what they are.
We already posted about crochet catnip bunnies, and this series about what to do with bits and pieces of yarn continues here with tiny yarn butterflies, the creation of Alessandra Poggiagliolmi at Home Made At My Place — actually, it’s a family tradition for her. Her mother taught her and her sisters during the cold Alberta winters of Canada where she lived as a girl. Those are cold, snowy, windy months, and yes, long months, as Alessandra remembers. So who knows how far this crochet pattern dates back through her family and the communities around them.
And now she has offered a free pattern and pictures to the crafting / crocheting community.
These colorful butterflies (although not exactly “crochet” per se, maybe, it is definitely in the general area of crocheting) only take a little yarn and can decorate almost anything. And you can make any number of them. Sort of like bows, you could make them when you wanted to add something to something else you were crocheting.
For this spare yarn project, you will need:
- a fork (4-prong fork) (– not a needle)
- small amounts of yarn
- scissors

Conceptual overview: You will start with the antenna / body — a 20cm piece of yarn, tied around a fork in a special way. The yarn is woven in a kind of mat over the fork, which is tied in the middle up-and-down (this up-and-down piece of yarn is another color and forms the body of the insect). The body ties the whole thing together and it can be pulled off the end of the fork, then the ends are cut into antennae and the butterfly is complete.
To learn about Alessandra’s family and the pattern, visit her blog (click here) and for her full pattern, click here.
Catnip Bunnies: What To Do With Leftover Yarn (Free Pattern)

Crochet DIYers, when you have leftover yarn, what do you do with it? Do you have a bin full of small bound balls of yarn about the size of a cat’s playtoy? You don’t throw them away, right? Because they’ll be good for something someday — some future crochet project. Well, you can use those small scraps of yarn to make small projects, if you just know what they are.
The first (of several — we’re going to do a short series on what to do with scrap yarn for crocheters) small yarn crochet project is the “catnip bunny.” Very simple design, but a nice one. Look at all the colors in the image up top. Which color does the bunny look most to your taste in? Of course, you probably have a bunch of scraps so you could make several of these.
This crochet project will turn into a toy to keep your cat active and interested, or you can give it to someone who has a cat — they’ll probably appreciate it, and maybe they’ll even become interested in crochet through your work.
Another nice thing about this crochet project is it doesn’t matter too much if you make some mistakes, right, because it’s just a cats toy and a small project, but if you get it right, you can see your skill level improve.
Although there are many crochet patterns for small toys like this, and actually, you could probably just wing it, we look to Selina Kyle’s pattern over at Ravelry. Selina Kyle is a blogger at Coffee and Cream, though, usually.
You will need for this crochet project:
- An unspecified amount of yarn (8ply (11 wpi) is what the pictures up top are made of, so you can see if you want thicker or thinner.
- A 3 – 3.25 mm needle
To download the free pattern, click here (it will download as a pdf). To visit Coffee and Cream blog, click here.
Great Big Sleeper Semi

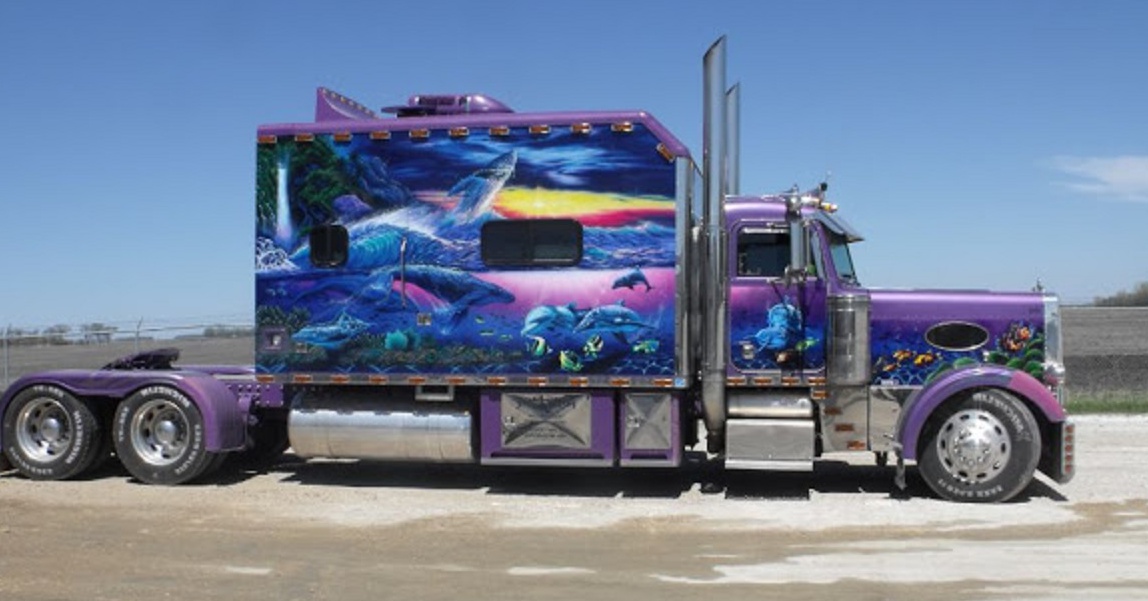
This large purple and blue Peterbilt with big extended custom sleeper is Clarence Falk’s — the owner of Flying Eagle Transport — and it has a bunch of unique and interesting features. It’s an award winning show truck referred to as the “fish truck.” It’s a 1998 Peterbilt 379. It pulls a 2003 Great Dane stainless dry van. And that custom sleeper unit is a 144 inch. Canadian Clarence Falk first showed the truck in Reno at Truckerfest with its new fish murals on the side and hood. This guy must like fish a bit. Falk is an owner operator who mostly drives between Winnipeg and Florida, hauling furniture primarily. He began his custom truck career almost 20 years ago, in the 90s.
“I drove by Louisville in March of 1998 and stayed for two days. Then I went home and took my totally plain truck and trailer and started working on them. I haven’t stopped working on my trucks since then!” The “fish” truck has neon dolphins on it, as well as a lot of chrome and a painted motor (sorry guys, found only these 3 photos of the truck, and in different places. It also has cut-outs in the hood (on the top and on the sides) (pictured).
Falk has 25 trucks but tries to drive down for at least one trip per month himself.
“It keeps me in touch with what’s going on out there and it also shows my drivers that I’m still a driver – not just an office guy.”
Also, visit Ten Four Magazine (click here), who documented the fish tale of Falk and his custom sleeper ride and Chris Arbon Road Trips (click here) where the photo was taken.
Giant Legacy Sleeper Rig

This custom rig with the giant sleeper unit is a bit of a mystery, and even after a lengthy search through photos, text, Kenworth models, truck sales catalogs, nothing comes up on this giant yellow thing. Of course, we can tell its a Kenworth — a newer model looking at that window and hood shape.
It’s surprising that a truck can get as internet-famous as this rig has got, and there to be no one posting on it.
Well, we got information on a few other mystery trucks, and maybe we can do it again. So if you guys can identify this truck, or even the model specifically, I’ll go back to looking and update this article just like our others, like the Massive and Mysterious RV a few of you were able to get. How about this giant custom legacy sleeper unit?
It actually looks much like another famous legacy sleeper Kenworth: this W900 with a 190″ sleeper. That’s quite the extended day cab, too. Not sure which is a nicer truck now, comparing the two (click the photo below to enlarge it).
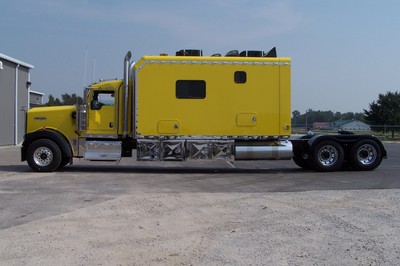
Funny enough, just about everything on both of these trucks looks the same except the hood. Is this just the natural progression of a Kenworth conventional into a giant sleeper unit?
Semi Convertible or Semi Limo?

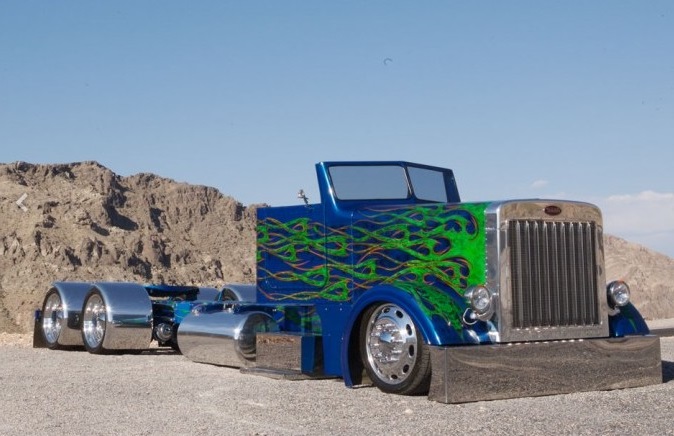
These two rides are the custom semi creations of Jeff Botelho, whose made a name for himself on the custom rides scene. If you could choose one, which would it be? The 2000 horsepower semi limo or the lowrider semi convertible?
We’ve featured both of these Botelho custom big rigs on Blogunity. Here’s the links to the two:
These vehicles can be expensive. I would estimate you’d need a million dollars to buy (or make) both of these vehicles. Custom big rig rides like these can often get up to around half a million dollars, and the custom RVs and RV-semis we also feature often here can go up more than that, what with all the interior fixings.
The custom semi limo has a bit of that. It’s base is a 2002 Peterbilt 379. It’s been turned into a 4-door with a 360-inch wheelbase and a 15-foot long cab floor. This truck dates back to 2010 and the American Trucker show (shown in an episode in 2011). This rig is called by its owner “Cowboy Limousine.” The 2000 horsepower comes from a Cat C-16 engine (modded from a C-15).
There are a ton of features and customizations to this rig, which you can see on our link if you want to read about it.
The convertible has been likened to a “large-scale sculpture that reflects a pop-culture aesthetic of the society” by custom semi aficionado Roger Snider. This truck started out as a burned out beater before it was entered in a 90-day Class 8 competition called the Louisville big-rig build-off. Yes, this convertible custom semi was built in 90 days.