The Sealander: camper on land, boat in water WHAT?
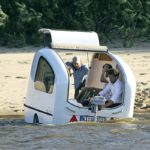
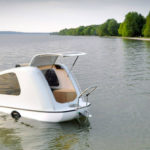
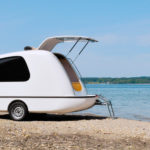
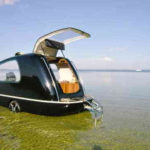
You can haul it through the forest and park it at the lake, then slide it into the water on its trailer. Your camper will float.
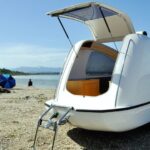
It has a convertible top, although the walls stay where they are. It’s kind of like the entrance to a cabin on a sail boat.
Featured music of the day:
To subscribe to this musician, click the red button:
You can mount your boat motor on the back of the unit, on the ledge where the convertible top raises.
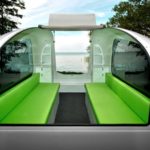
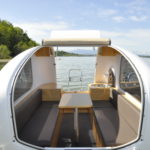
The cabin has two long bench seats; one along each side. They appear waterproof. Then a person can install a cabin-style (or RV / campervan style) table in the middle of the bench seats. The bench seats can also be pulled toward the center to create a padded surface area over the entire cabin — as a bed or mat.
Its German-made.
“The Sealander is a caravan and yacht in one. The high quality and aesthetics of boat-building are combined with the flexibility of a mobile home. Its dynamic and modern design expresses lightness and agility. For your perfect day out in every environment,” the company says on its website.
It’s touted as the first amphibian camper, but that might be a bit misleading, because we have amphibian campers and even camper-planes on this website.
The Camper-Boat Hybrid Sails Again
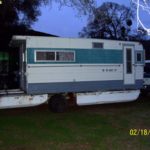
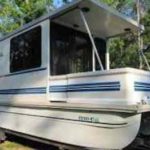
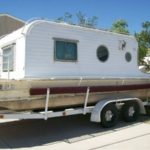
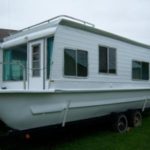
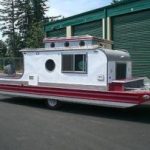
Some great things happened in 1969, and one of the interesting vehicular developments to come out on the lots that year (1969-1970) was this boat-slash-camper. It’s called a Terra Marina, and it was made by Aqua-Trail (interesting name).
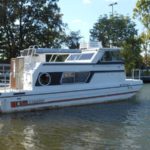
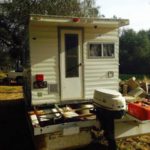
There’s actually a few of these around still. They look like a trailer, yes, but then they have two pontoon boats underneath them. The pontoon boat in the back serves as a deck!
And the boat motor is mounted to the back of the deck/ back of a pontoon boat.
It kind of seems to me like anyone could make one of these boat/camper RV units.
The way they set it up, they put the trailer under it all so that the wheels of the (2-wheel trailer) sit between the two pontoon boats.
The company (Aqua-trail) made around 35 units of these in the Sacramento area.
Tin can tourists explains how you launch them: “The trailer was designed to be used both as a houseboat and camping trailer. It is totally self-contained. When brought to lake the sides are lifted and the pontoons slide out and are secured. The entire craft is then released to roll into the water. It has a top speed of 7 knots and is easy to control.”
The RV has all the amenities normal RV trailers have: bathroom, shower head, kitchen, furniture, table,
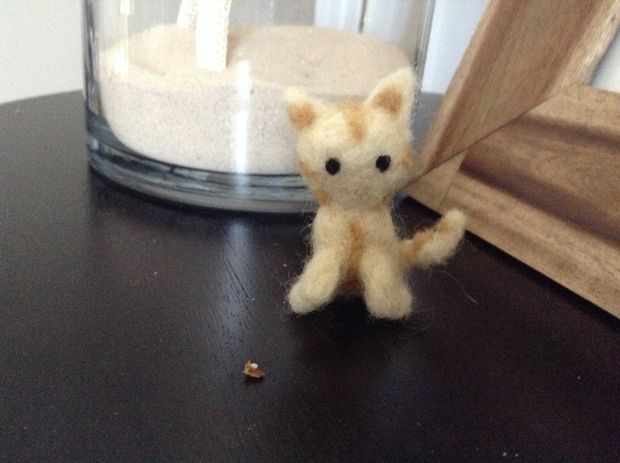
Great news for momo-lovers for it’s time for momo wet felt making. Creating a kitty with wet felt is absolutely awesome! Crafty minded will enjoy this and will really have fun! Definitely, it is adorable even for those who have no interest in cats!
Make use of a felting wool with two different colors. Orange color felting wool is for the main body and white color felting wool is for the stripes. Black is for the two cute kitty eyes, three textured needle and four sponge block. You can use a pillow for the sponge block.
Now it’s time to work for the kitty’s head. Loosely roll the orange color with your fingers. Never roll it tightly as it might not shape the cat’ head properly. Then stab it continuously until it is shaped like a ball.
For the body, stab over and over until the cat’s body is formed. The next part is the tail. This time you have to tightly roll with your fingers. Swirl it with your fingers to form a curve shape. This will create a cute kitten. Attach the rolled tail to the cat’s body.
Place the eyes and put a few whiskers to make it more realistic. Now, your cat is ready!
We learned about this neat information from Instructables. Visit Instructables
Felt making is a fun hobby for creative hands. You only need a few inexpensive materials. I am sure you have a sushi mat in your kitchen but it is better to get a separate one for your arts. Prepare merino wool top, a bar of Castile soap, soap shavings, tutu fabric, a plastic bottle container that has holes punched in the lid and some lukewarm water and 2 teaspoons of soap shavings.
1. Pull a tuft from the merino wool. Keep in mind that cutting the wool will result to a blunted edge which is not good for making a felt. Be gentle as possible when you pull off the tuft of the wool.
2. It is nice to use at least three different shades of the same color. Strong pink, moderate pink tint and light pink is a good blend of shades for your felt. This will create an interesting appearance unless you want a simpler one, make use of just one shade. To create three different shades, pull the tuft together and lay them one on top of the other. Then clutch the ends and gently pull them apart. Lay down the other two tufts and repeat the procedure until you get a beautiful blend of the shades.
3. Now, it’s time to spread the bubble wrap on your working surface and place out a few tufts of wool on the bubble wrap horizontally. Make use of thirty centimeters square of bubble wrap.
4. Then vertically lay additional tufts to cover the first layer.
5. The third one must be horizontally laid like the first one.
6. Place carefully a piece of fabric over the wool.
7. Sprinkle water on the wool over the net but make sure not to over wet it.
8. Now polish the wool using a spherical direction through the top of the net.
9. Peel back and then take away the net, freeing any stuck fibres. Lift it off the bubble wrap and place on top of the sushi mat.
10. Troll the sushi mat up compactly and drain off any extra water.
11. Carefully unfold the mat and turn the felt.
Roll the mat up and repeat the rolling process for about a minute.
Repeat steps 10 and 11. Check to see if the felt is already felted and check it by doing a pinch test. If you pinch it and you can still pull the layers apart then it means that it’s not yet ready.
12. To remove the soap, rinse it will lukewarm water. For the final rinsing, use cold water.
13. To create your desired shape, use cookie cutter. A round shape or a heart shape may do.
Our bodies definitely have a specific way of functioning, and there are certain elements needed for it to function healthy. I am always amazed at the articles that are written about Omega-3. I consider in some sense it to be on the level of requirement in our everyday lives. I am aware of the cardiovascular benefits by taking Omega-3, for it will help with lowering cholesterol and triglycerides. And it makes sense that Omega-3 would help with reducing joint pain from those who have Rheumatoid arthritis because it reduces inflammation.
Omega-3 helps those with mood swings, depression, poor memory, and circulation. The facts are the size of our brains is what makes the difference when it comes to poor memory. Studies are showing that as we age our brains start shrinking. An example of this is in Alzheimer’s the brain cell’s shrink and are replaced with dense spots know as plaque. Remember, when I said Omega-3 has cardiovascular benefits it works the same way in your brain. Omega-3 may halt or prevents the shrinkage in your brain.
The International Conference on Alzheimer’s disease was held in Paris. Dr. Loris Daiello presented at the conference a study consisting of 819 older adults. The data consisted of 117 men and women who took the fish oil regularly in comparison to 702 those who did not. After three years she gave a memory test to the 819 people. Her findings were the shrinkage of the brains was less in the 117 people than those who did not take Omega-3. Most people are unaware of how importance the meaning is; “You are what you eat.” Although every person’s bodies is not the same, there are elements that can assist everyone in living healthier. Of course before anyone decides to change their way of living it is always advisable to converse with a certified doctor.
I can remember when I could eat almost anything without having indigestion. I do not remember changing anything to cause it. I only grew older…humbug.
So how does this all work? Most of us understand the concept of chewing food and salivary gland secreted together in order for the food to be broken down into smaller pieces. The saliva contains an enzyme called amylase; this enzyme moistens the food and helps it pass through the esophagus as well as split starch and sugars. This starts the connection between the process of chewing and swallowing the food.
There are quite a few enzymes which are needed in the digestive system, but there are three enzymes specifically function based on molecules that help digest foods. Enzymes are one of the processes in your body that for some people do not work as well as when they were younger. The Enzymes work by breaking down large insoluble molecules of food into smaller molecules so they are easily absorbed by the body. There are three molecules in most people’s body that function at certain parts of the body and they are as followed:
Protein molecules are composed of many different amino acids and the protease enzyme’s break down these molecules. The protease enzymes begin in the stomach by breaking down the protein molecules. Amylases enzyme breaks-down the starch molecules, which are made up from many glucose molecules called the carbohydrates, which starts the digestive process in the mouth. Our fat molecules consist of not only our fatty acids but the glycerol molecules and needs the enzyme lipase to break down the fat molecules.
Of course there are other important processes needed for digestion. Hydrochloric acid’s role in digestion is to rid of any bacteria remaining in the food. There are eight major digestive enzymes when it comes to digesting food. And each one of them has a specific role.
Since the original write up for this Kingsley Coach custom motorhome, quite a few people commented and provided info on this big RV, and we thought we’d share some of this with you all again:
Several people pre-ordered their own versions of this big RV: One guy wanted it in silver and blue with a trailer hitch, trailer flat bed, and a matching town country on the back. Another wanted his to be either a Peterbilt or Kenworth but with a 5th wheel. Another just preferred Peterbilt to Kenworth, and others seemed to agree a W9 would be nice to see as well as the T2.
Others were more open to the options: Al Velneff said, “I’m in love with everything except the seven digit price tag. Lol!” and Jim Cooper, “As long as you can pass a CDL…..Makes a great platform.”
One surprising piece of information:
Gordon McKenney said it use to cost $27 to register this for two years in Oregon.
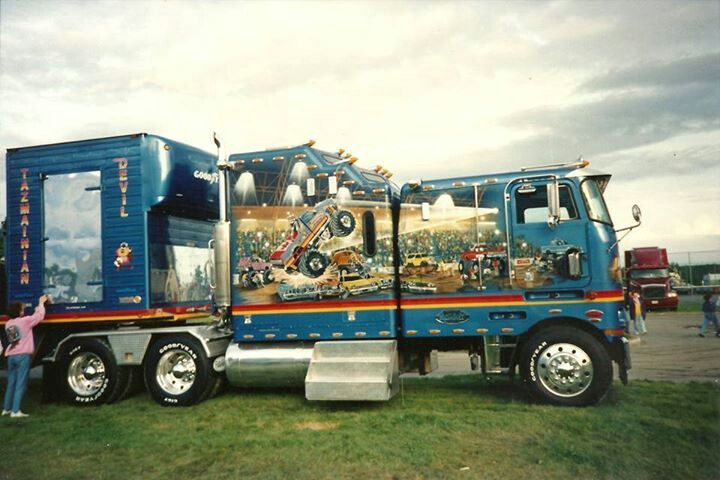
Paint job. Massive sleeper. Custom styling. Vintage semi truck. The owner-operator of this tractor is Kim Lavergne (or was… the pictures are somewhat older and I don’t know if Lavergne is still running the 1982 Peterbilt. If anyone knows more, or has more photos of this great truck, please share them with us).
The mural on the passenger side is of a monster trucking scene where the truck is landing on its rear wheels on a line of crushed cars. It’s guessed that this would be a very, very intricate and expensive mural extending from truck to sleeper on this custom cabover design.
Vehicle: 1982 Cab-over Peterbilt frame up restoration
Engine: 400B Caterpillar Diesel
Transmission: 15 Speed Overdrive with 4/11 Gear Ratio
Details: Sleeper has fridge, stove, shower and sleeps six. Trailer is custom built. Won awards for best double bunk cab-over, best paint, most outstanding truck.
Cabovers are a style some love, some don’t, are necessary in some trucking locations, aren’t in others. In Europe, for example, the cabover thing has a lot to do with truck size limitations.
For those in the debate, we’ll list some of the noteworthy pros of the cabover, as explained by cabover enthusiast David A Kolman at RoadKing.
“The wrap-around instrument panel and controls and doghouse (engine cowling or tunnel) gave the feel of a cockpit. Driving was a pleasure because the short wheelbase of cabovers allows for a shorter turning radii, which makes for easier maneuvering — especially in tight spots, backing and sharp turns. Another desirable: cabover rigs require less parking space.”
Kolman also likee the broader field of view that is due to the large windshield. He liked the “unobstructed visibility.” It also, he said, gave him more confidence when he was driving in avoiding accidents and driving safely.
Of comfort, the cabover advocate stated he thought the smaller space required by a cabover combined with its great maneuverability (tight turning radius because of a front wheel cut of up to 50 degrees, an this wheel works with the mid-axle back setting) would make it popular again, but he was “mistaken,” he said, because it hadn’t happened that way. Conventionals remain popular.
Here’s a (semi-modern) classic 379 Peterbilt outfitted with a 150 inch Legacy Custom sleeper. This truck actually won awards – it took a first at the 32nd Annual North American Trucking Show (NATS) in Baltimore a while ago.
Have you ever been to one of these shows? Visitors and show trucks from across the U.S. and Canada came to the Convention Center (in this case in Baltimore) to celebrate trucking. The citizens and city provided a warm welcome to trucking enthusiasts, with balmy days and the chance to sample world-famous Maryland Crab Cakes! Dump trucks and tow trucks, reefers, vans and drop decks, day cabs and supersized sleepers, are shown.
This Peterbilt won a 1st place in the Interior (Aftermarket Sleeper) division. It’s a 2002. It’s owned & Operated by Donny & Susan Pardue.
In 2002, the 379 was still in it’s heyday as Peterbilt’s flagship (the role it took from 1987 until the 2007), maintaining the nameplate’s signature long-nose styling.
The change around the time (and the distinguishing feature for you truck identifyers) of this one were the “Ergonomic Dash” (part of the truck between 2001 and 2005). The main dash color was black up until the 2000 model year, which was the last year for the “Original Dash;” you could either order it in gray, tan, or black.
The sleeper on this one is a custom Legacy Sleeper made by American Reliance Industries out of Indiana.
 " >
" >