Crochet Mermaid Blanket (Free Patterns)

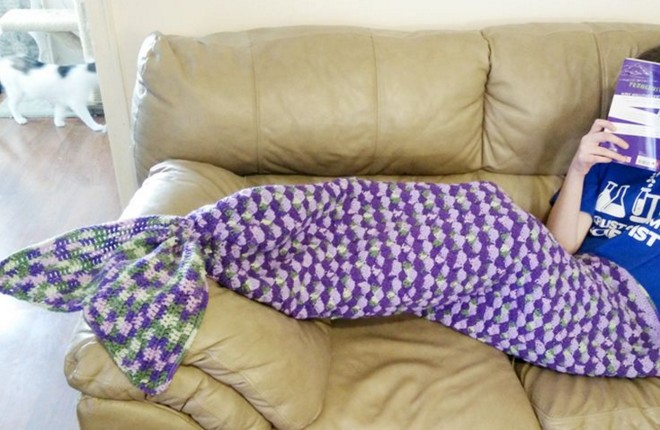
Would these crochet mermaid blankets — or mermaid Afghans, as they’re also called — be a “splash” in your home? This popular idea has been circulating around the internet, and we’ve found some free patterns for you so you can make as a crochet project yourself if you want. We feature three crochet mermaid tail patterns here: Two are free ones — one created by Nadia over at Yarnutopia (below picture with a purple tail) and one by Shelly Bunyard. Then we also link to a pattern that costs around $6 because we like the look of it: it’s the picture above and its by MJ’s Off The Hook Designs. We include them all because they’re all nice designs and we want to suit a range of what you guys — the readers — might want to make. As for Nadia, she doesn’t even mind if you use her patterns to make money off of Etsy or other sites, she wrote, but just make sure you make a note that she’s credited for the patterns.
Nadia’s patterns are three sizes of crochet mermaid blankets. The smallest crochet pattern will make a mermaid tail to fit a child who is 4 foot 5 inches tall. The medium pattern will fit those 5 feet to 6 feet tall. Then there is a large pattern for anyone over 6 feet tall. Giant mermaid tail Afghans. Then there is a tail fin pattern that is just one pattern — you can affix the tail fin to any of the afghan mermaid tails.
For all the patterns, the width is the same. That means thinner and thicker people can use them — they’re around 50 inches wide. Nadia opted for a scaly pattern in blue for her tail, unlike the ones pictured above. We feature that above image because people like the idea of those pastel-ly aqua color and wine color. The colors provide an interesting eye texture.
The other crochet mermaid tail pattern available for free that we found is in the image below. It’s an adult sized one and it’s the work of Shelley Bunyard over at MadHooker crochet page (link to this free pattern also provided below).
The materials you’lll need: Medium (worsted) weight yarn, 2 or 3 skeins Macaw, jade, peacock (these are the colors she used), J-6.00mm crochet hook, Yarn needle Stitches used: chain, slip stitch, double crochet, and single crochet.
Here is the 3 sizes patterns: It’s a PDF, and remember, it’s the work based on several online patterns of Nadia at Yarnutopia. Click here to open. For the adult-sized crochet pattern pictured at the top for $6 by MJs Off the Hook Designs, click here. For Shelly Bunyards adult-sized tail, click here.
Crochet Basic Men’s Beanie — Seamless (Free Pattern)
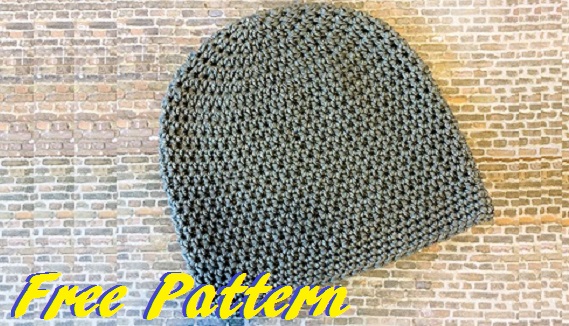
How do you like this crochet men’s beanie? These hats look good on men. Almost everyone in the northern climates wears beenies it seems like, but a lot of the time they are just standard polyester-cotton blend flat fabric beanie (or touque) from any old clothing store. In part this is because these hats — the crochet ones — are hard to find. They’re not in just every store. You can’t even find them at all in small towns, as any small town citizen knows.
Look at the texture of this DIY crochet beanie though. It has a varied pattern down near the brow, and the rest of the whole beanie is seamless! There is no front or back — you just put this crochet beanie on! Take a look at it and think of the other colors and which one you’d want to see on whoever you’d make this for or give it to… or would you just borrow it right away? There’s no reason these crochet projects have to be for men. Women look good in these beanies — I think it’s just called a “men’s pattern” because it’s not every crochet pattern men can wear.
This free crochet pattern comes to us from Little Monkey’s Crochet. They ran a challenge to make 100 hats that the Columbia team would take and give away to homeless people along with other needs. The whole thing seems to have been through Project Hope Ministries (their Facebook page) (non-profit organization). This DIY crochet project is rated “easy” by Little Monkeys Crochet.
You will need:
- Soft worsted
- An I hook (5.5mm)
Basic concept of the crochet project:
The beanie is made by working in a continuous round. (There’s no joining or turning), you just keep adding on in a spiral pattern. Use a stitch marker for keeping track of the rows you make.
There are 25 rounds. The pattern breaks these 25 up into 9 sets, each with their own instructions. For the complete detailed pattern of these 9 sets, visit Little Monkey’s Crochet and scroll down to their free DIY crochet project beanie pattern (click here).
Easy Crochet Throw Pillow (Free Pattern)

How about these colorful textured crochet pillows, they’re an easy crochet project even for beginners. You can make these in any color or pattern you like and — look at that photo — who wouldn’t want that on their couch. I mean really, you could give these as gifts to anybody and they’d be happy with them and you’d see them on your friends’ furniture. Look how comfortable the texture of these things looks!
All you need to get going and make these throw pillows is your yarn, needles and scissors and your chain, single crochet and turn. The color this crafter used — her name is Jennifer and she’s an Idaho wife and mother over at the Craft Patch — was Persimmon by the Caron Simply Soft line of crochet yarn.
Supplies:
- 2 skeins of yarn
- crochet hook (size N)
- large-eye blunt needle
An interesting thing about this crochet project is you use 2 pieces of yarn at a time– one piece from each skein. You just double them up right beside each other as if they were one thread and tie them both around your needle just like that.
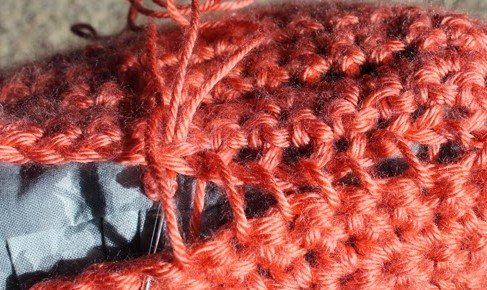
Then you chain 12 inches for the width — 25 stitches. Single crochet for 36 inches — 50 rows — and tie off. So the pillow is 1 foot by 3 feet. in fabric, but it’ll be folded in half so the pillow will be just smaller than 1 foot by 1 and a half feet.
Then you insert a pillow form inside the two halves you make. You fold your piece of fabric lengthwise and tie it using a long line of yarn. Use a blunt-eye needle for this. The stitch Jennifer uses is a whip stitch for the three sides.
For the full detailed pattern, click here. To visit Jennifer at the Craft Patch, click here.
Crochet Fingerless Gloves (Free Pattern)

Do you like these designs for crochet fingerless gloves? There’s three of theme featured, so you can see a bit of the variety people have come up with in making their own crochet projects with these patterns. Winter can mean cold hands. Do you have to drive to work in the cold mornings? or how about tend to outdoor chores and activities at home? So for those times when we can’t be inside warming our hands around a hot mug full of tea or coffee, how about crochet fingerless gloves? We like patterns and especially free patterns. So we picked the one of these three glove ideas we though looked nicest — the blue puffy one (it’s called a puff stitch) — to feature a free pattern for.
We might make some more posts for some more fingerless gloves if you guys want them or if you seem to like this one. Puff stitch is used not just for gloves, but also fluffy socks, blankets, scarves and anything else you like to be puffy, so it’s a nice technique to master for any crocheter.
This blue fingerless pattern comes from the hand of Olivia over at Hopeful Honey. She’s a crocheter who finds her inspiration and tries to fill her life with beauty with art, nature, music and people.
What you’ll need:
- 450 crochet hook
- 8ply wool (any)
- wool needle
- scissors
How to measure for size: take your tape measure and take a wrist measurement. Add 4cm to that, and you have the size to make the ribbing for these crochet gloves.
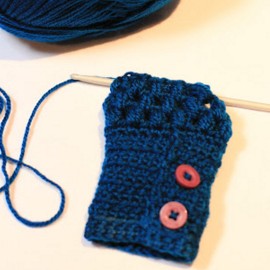
General concept of making these:
- Make the wrist ribbing with a slip knot, crocheting 32 chain stitches. Add rows until you can fasten it off.
- Pick 4 buttons and put 2 on each wrist ribbing, then button up the ribbing.
- Now the wrist will be done and you’ll move on to adding the hand. This is made with:
- Slip knots
- Single crochets
- and this is where the puff stitches come in. To learn about the puff stitch, there’s a tutorial at the bottom of this page.
- Fasten off
And that’s it, you’ll have a pair of your own crochet fingerless puffy gloves. For the full detailed pattern by Olivia, click here. For a tutorial on puff stitches, click here.
Crochet Amigurumi Animals (Free Pattern)

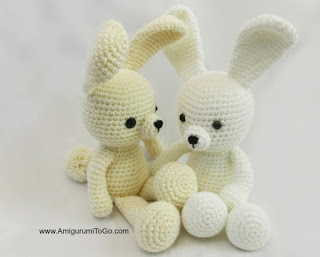
These stuffed animals are the creations of a crafter named Eineidee. It seems there are a lot of these “amigurumi” crochet stuffed animals around, and we wanted to find a free pattern to get you started. Now, there is no free pattern for Einedee’s lambs and other crochet animals (four types in the picture above), even though they are very pleasant colored and have neat little patches on their chests and have drawn a lot of attention. There are patterns available for them for around $15.00, and you can actually buy the completed doll dolls for upwards of $60.o0. But on Blogunity we try to provide crafters with a free starting point. After all, maybe you’ve never even crocheted a stuffed animal before — maybe you don’t even know if you can do it or if it’s something you’ll enjoy, so you want to try out a free pattern first before you go over and buy the nice one (I’m sure it probably is) for a price.
Here’s the crochet pattern we found for free. It’s for a bunny, and looks quite a bit like the one pictured at the top. There are some pictures of the bunnies this pattern is for if you look down lower on this page. You could add your own colors, which is something you’d probably do anyway!
The free crochet pattern is by Sharon Ojala, and it’s called the “Dress Me Bunny Crochet Pattern.” It’s actually a bunny pattern that comes with a crochet dress pattern and boots pattern, and basket of carrots, and carrot purse. You can do any or all of these. It will make a bunny about 1 foot 3 inches tall (including ears).
Materials needed: Yarn of your choice of color, 4.0 or 4.5 mm hook, blunt end yarn needle. Then you will need scissors to cut and stuffing to stuff. You can use buttons or paint for eyes.
The stitches involved include:
single crochet, slip stitch, and crocheting 2 stitches together.
I have to warn you, as far as crochet patterns go this is a very long one. I mean the arms have 8 steps, the legs have 12 steps, etc. To see Sharon Ojala’s free crochet pattern at Amigurumitogo, click here.
Luxury Motor Home
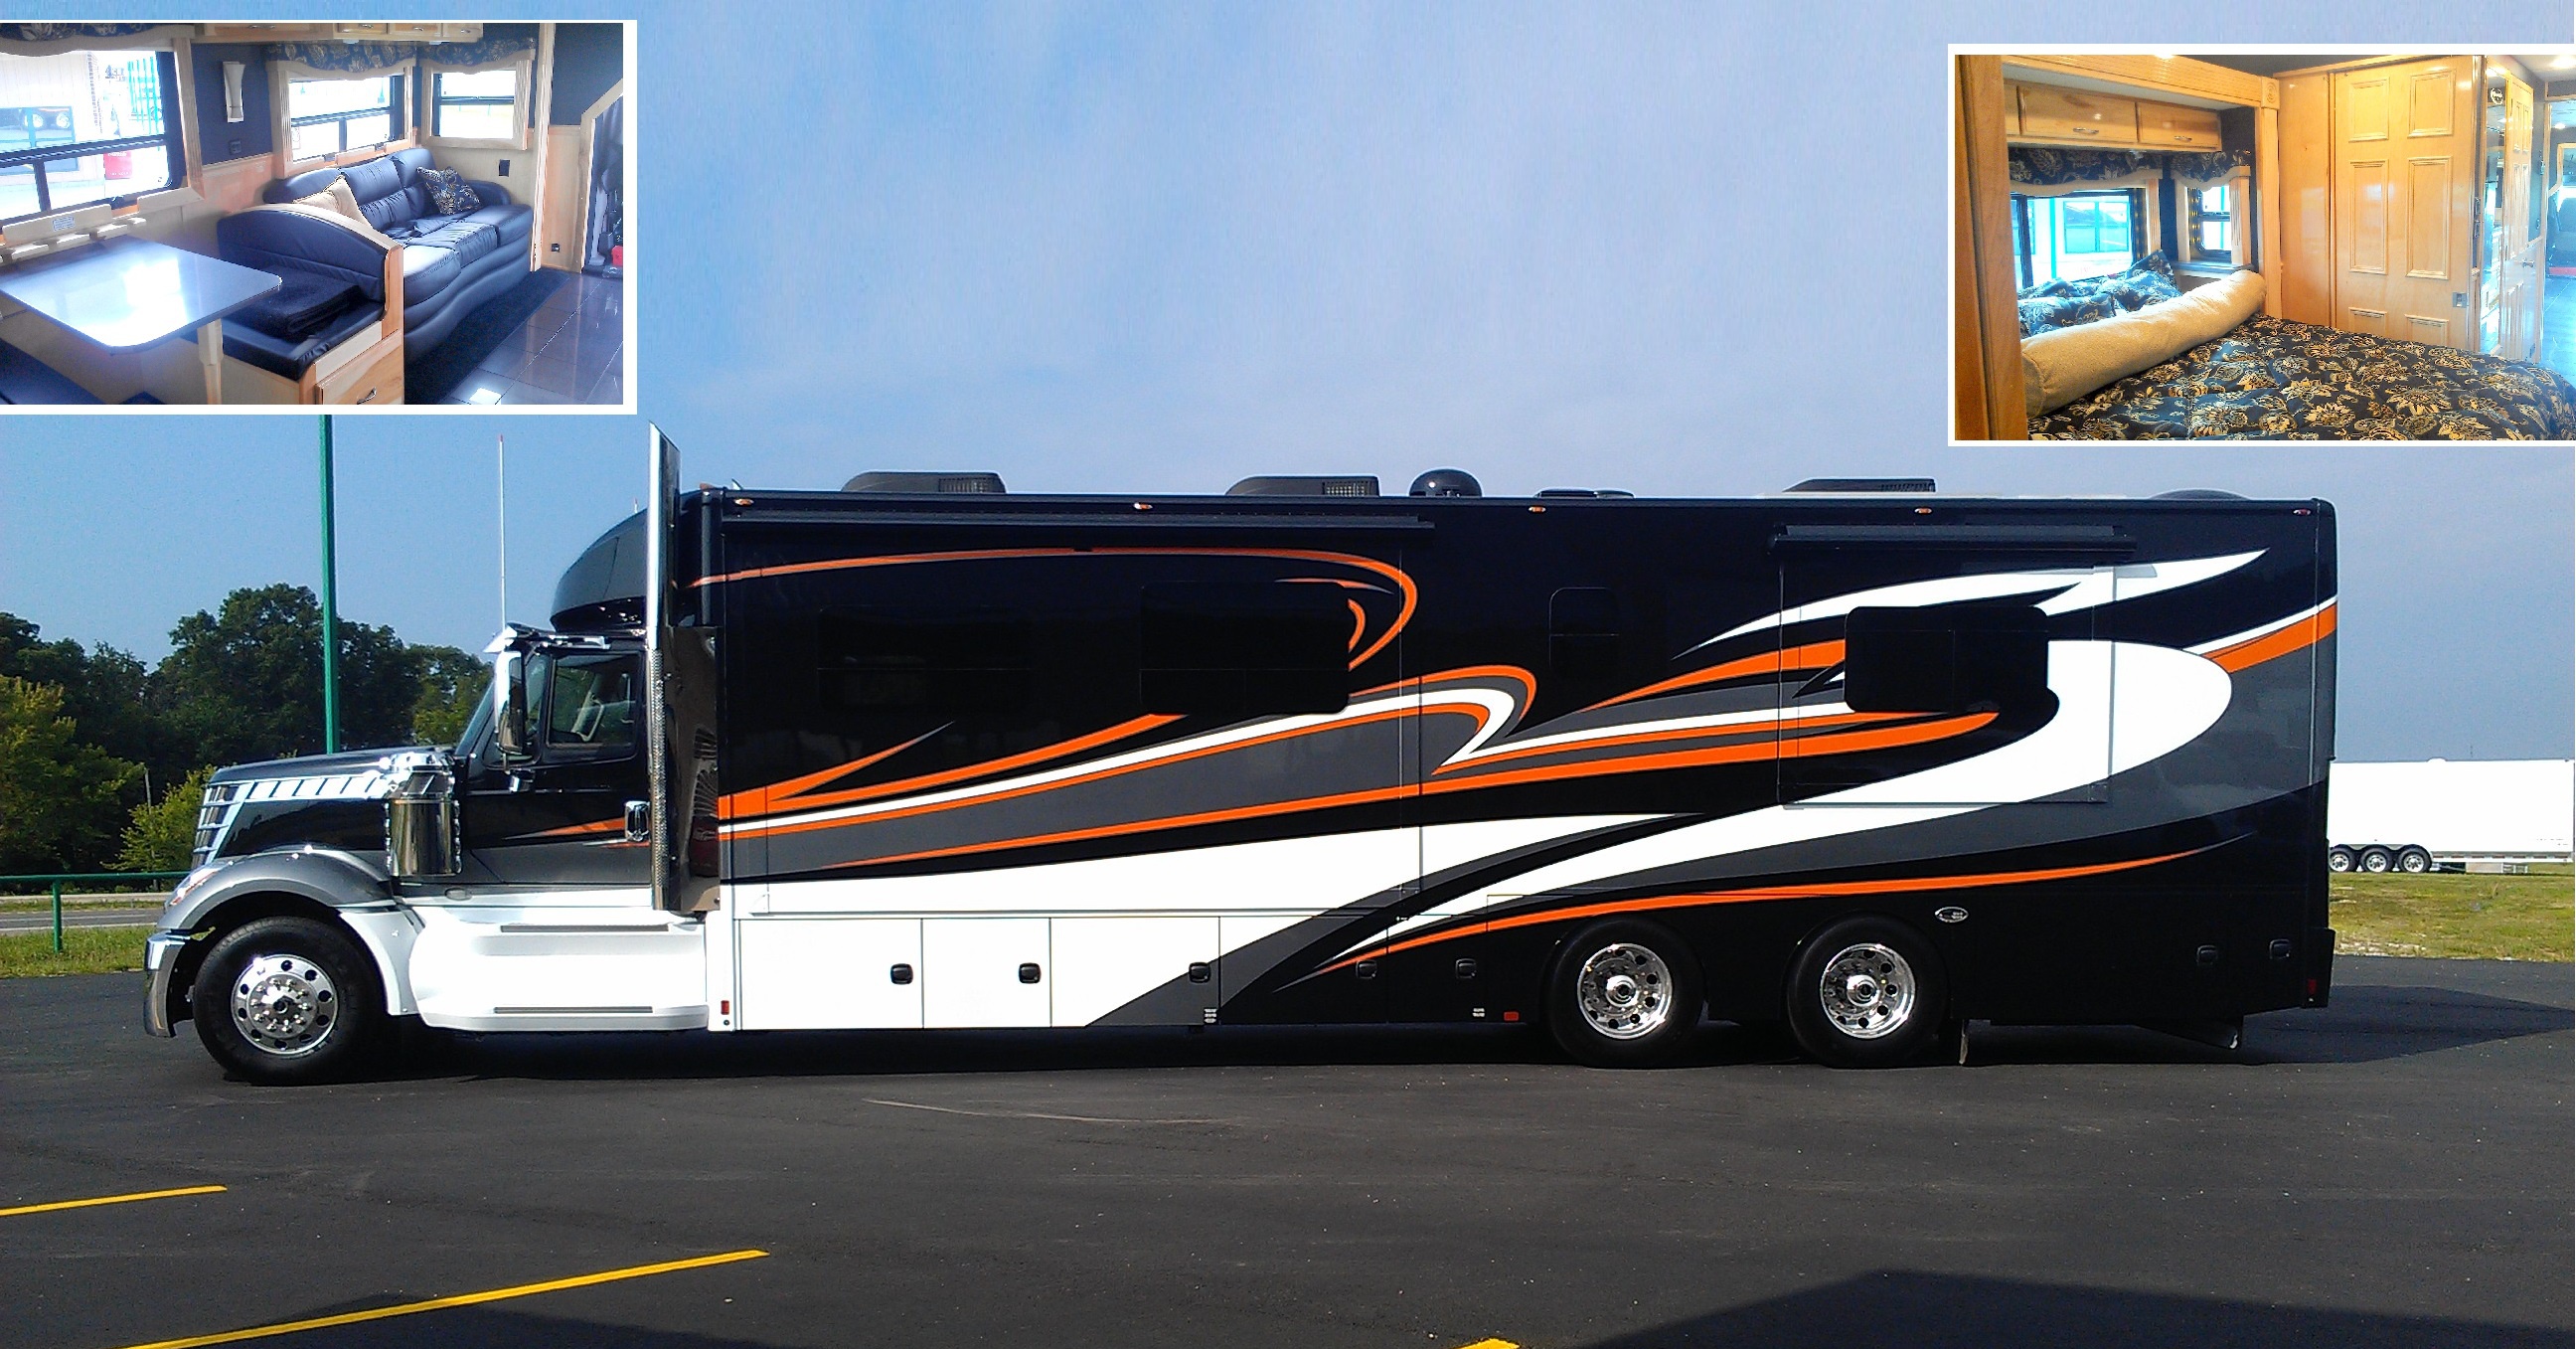
Boy she’s a real beaut Clark with that Mad Max road warrior look thanks to International trucks. This bad boy seems to have all the bells and whistles.
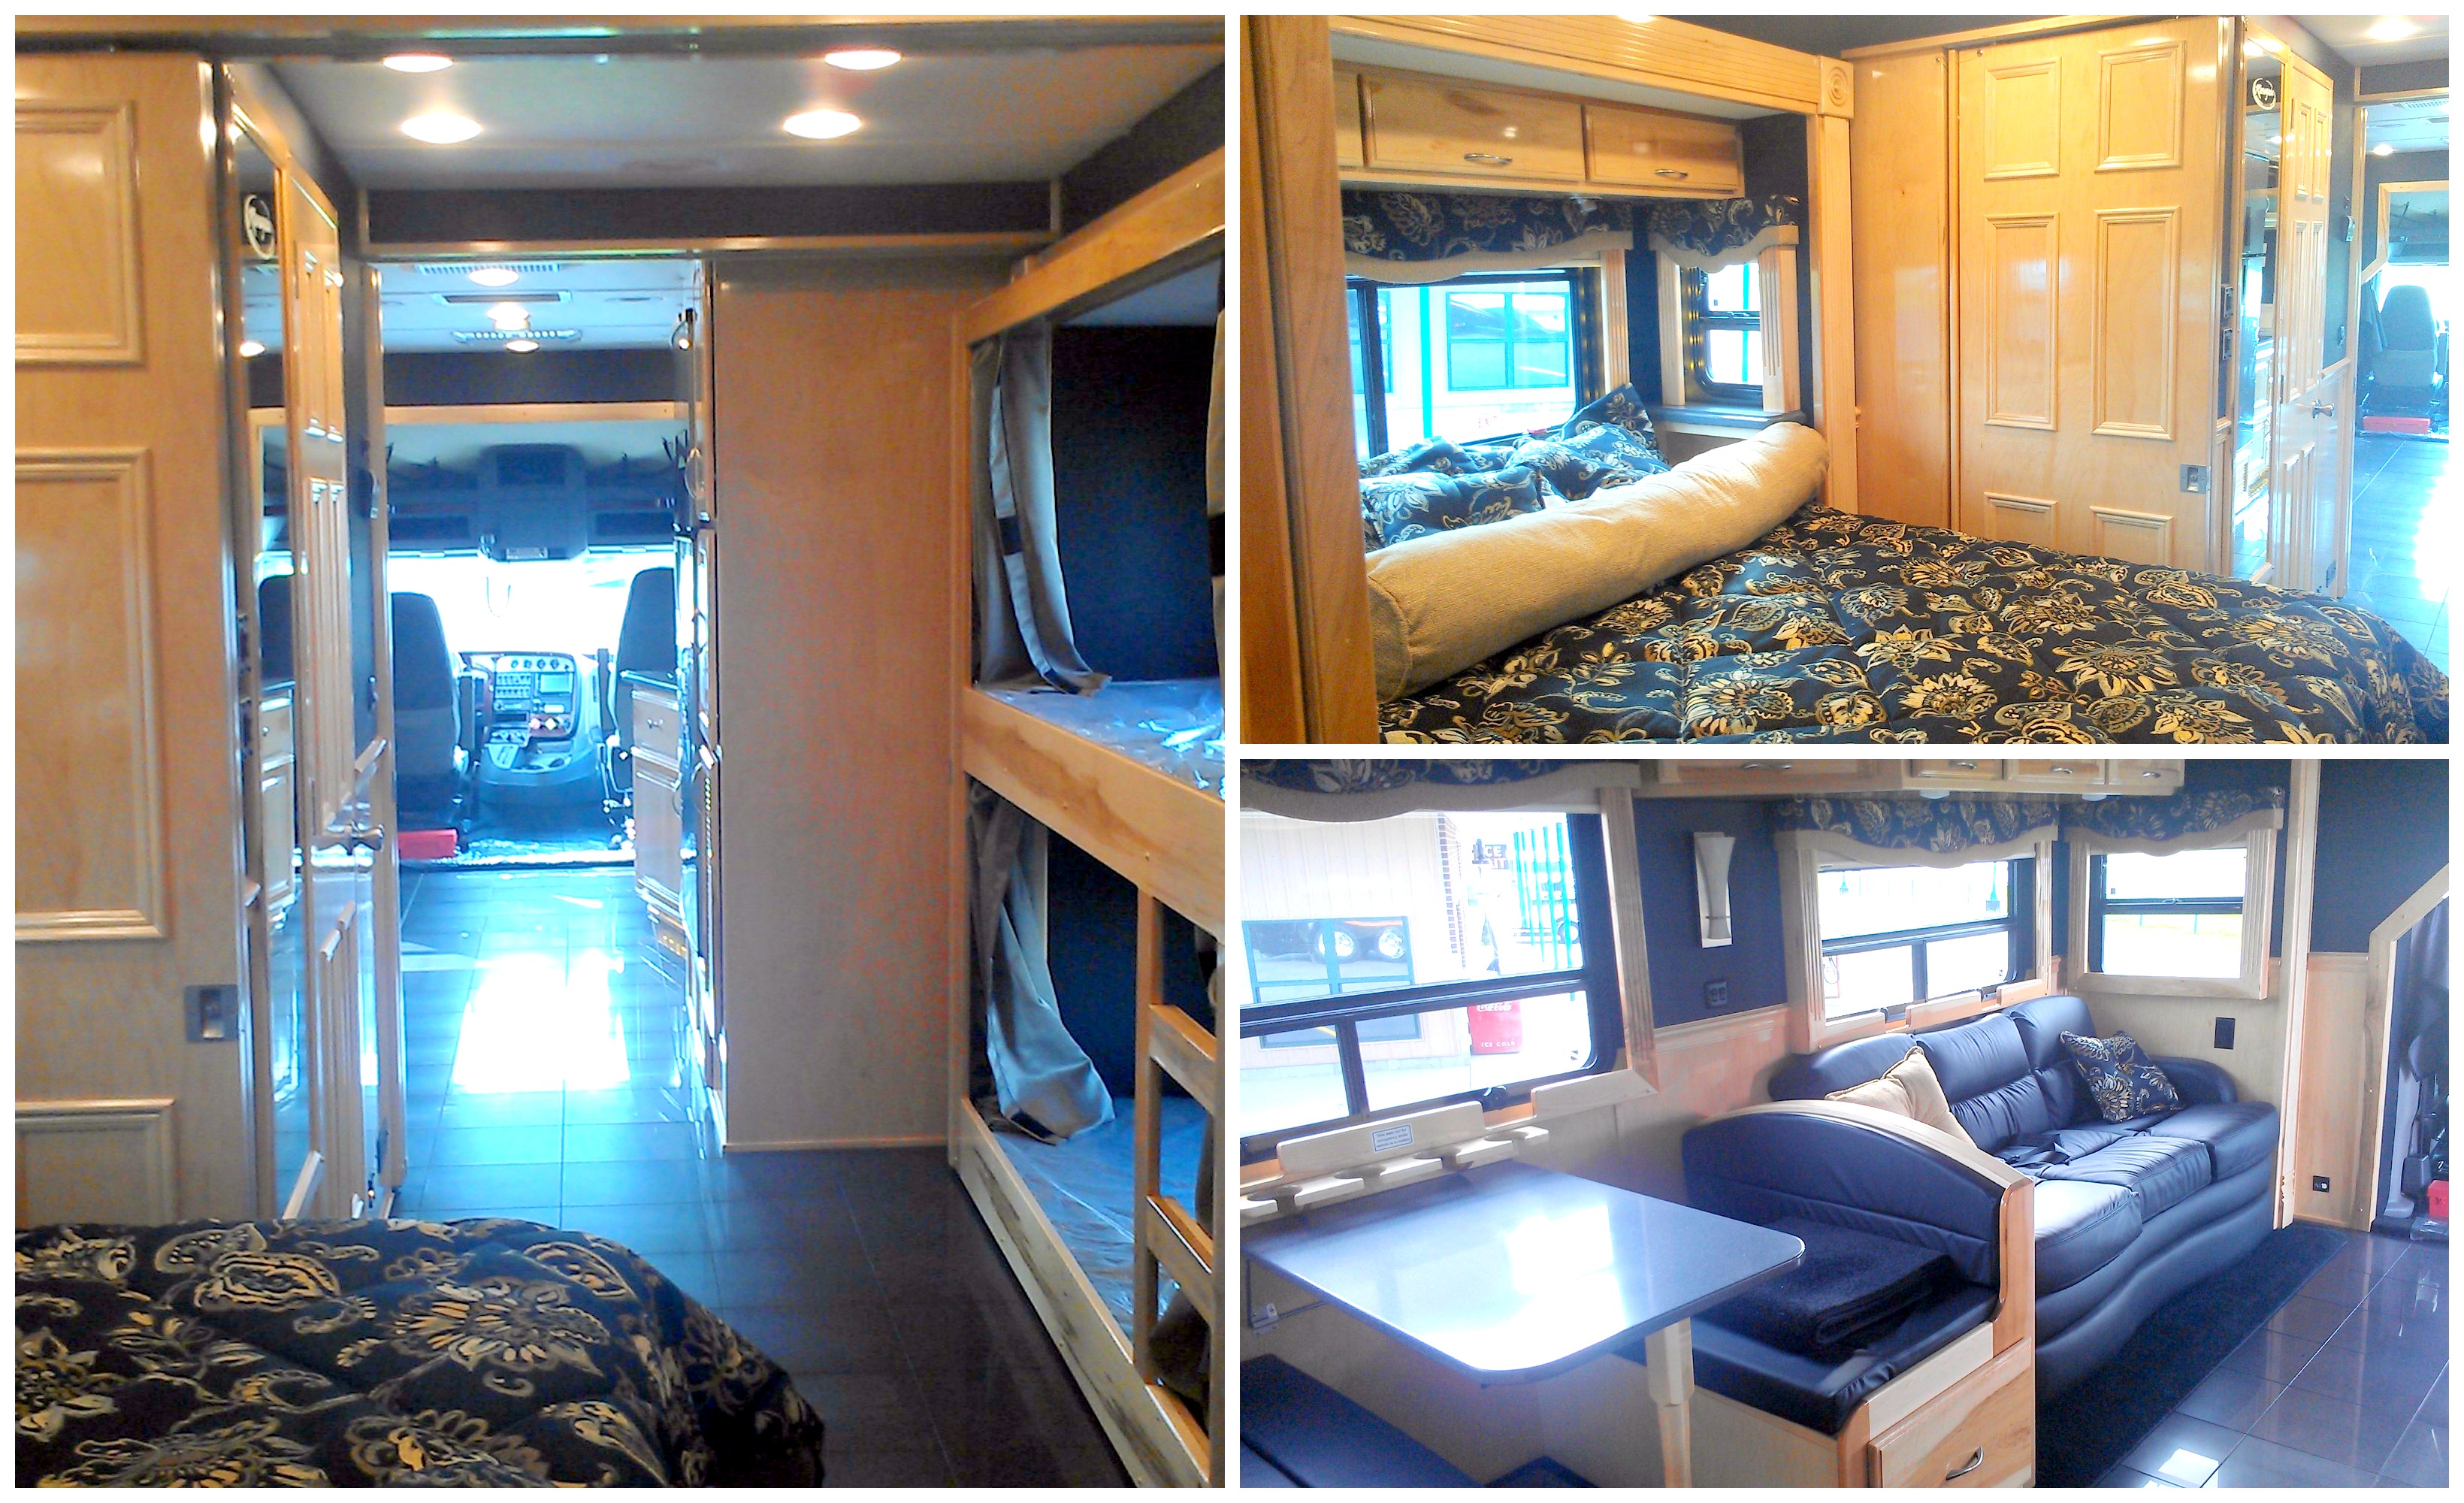
I mean, come on man, a 550HP Hi-Torque motor, auto transmission sitting on a 33’ chassis. The list just keeps coming at you. It’s loaded with power awnings, 3 slides, 3 AC units, tracking satellite dish, 2 full baths, and a 4 door refrigerator.
I thought cruising was just for Harley-Davidsons, boy was I ever wrong. I could do this RV thing day and night with this custom paint and aluminum wheels you would be the talk of the road by many rv’rs. When you get to where you were going, it hopefully would be a full camp ground so if you were like me, you’d just start showing off using your auto leveling system, stoking up a fire, turning on your outside LCD TV, and grab a cold one out of your outside refer.
Hopefully there would be all kinds of fellow campers walking by with their dogs and kids riding their bikes so you could reel them up to the RV and take them inside for some more showing off.
Custom power window shades, high gloss cabinetry with wainscoting. Maybe have the old lady fire off the Dyson vacuum system (just cuz she can) HaHa.
Also point out the 12.5KW generator that could run it all if need be. All and all this unit is a real beast in my opinion with The feel and appeal of a custom built Lake House on wheels.
By Craig
Unfortunately, this particular custom luxury motorhome unit is already sold. The price was not listed.

Crochet A Contortionist Cuff
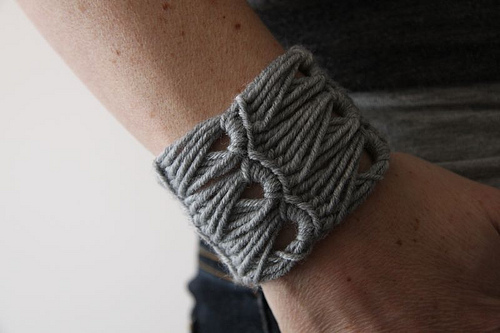
Do you like this intricate design? The yarn braids in on itself and stretches like a spider’s web. Quite the pattern. On the other hand, while this pattern is somewhat detailed and complex, it’s a bracelet so it’s of a manageable size. And it’s the kind of thing anyone can use — especially during the colder months — and doesn’t take up much space. It can be like an accessory to your clothes.
This type of crochet pattern is called a “broomstick lace” pattern. It’s the work of the hand of crafter Kootoyoo. There are a lot of patterns and tutorials available to learn how to do basic crochet stitches such as the those involved in broomstick lace patterns. But here’s one tip: Use your knees, that’s what Kootoyoo says. She braces the needle between her knees / thighs to make managing the needle and hook easier.
Depending on how big your wrist is, you might need 4 or 5 rows. The bracelet should fit snugly around your wrist.
So first off: Make your foundation chain. You can do a chain of 15 using 3 groups of 5 loops for your lace.
Then complete a row of double crochet (US single) before you begin the broomstick lace. The double crochet row is to provide your pattern (and yourself) with stability.
Crochet your swatch of broomstick lace. It looks a bit like chain-mail or scales. This is where you have to decide if you want to make a 4 or a 5 row wide bracelet. After completing the broomstick swatch, you can add a row of double crochet again — again, to provide you and your pattern with stability.
Now you fold your cuff bracelet in half. Make the two ends meet.
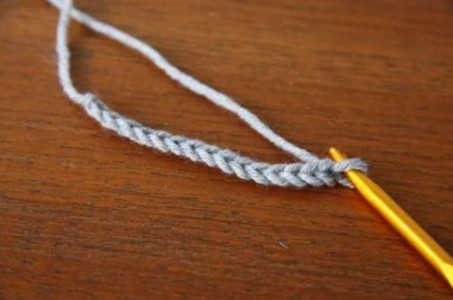
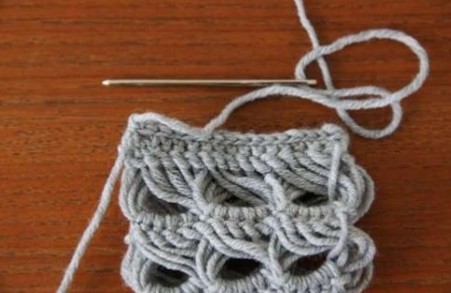
Then with the two ends, use a slip stitch to join them up to form the circle of the cuff.
You can use a large tapestry needle to weave in your ends.
And you’re done. It should look like the photo at the top. Of course, there is a lot of room in a pattern like this to detail and customize it how you want it. Some people even add some buttons and make it a bracelet that can fasten with the buttons rather than being a full round band.
Also, visit Kootoyoo, a blog where there are a bunch of random blogs in all kinds of subject areas. Hope you enjoyed this crochet cuff project. We have a lot of other crochet projects on Blogunity as well.
Braided Crochet Headband and Earwarmer (Free Pattern)

When ears get cold in the winter it might be time to crochet a braided headband / earwarmer like this one? The warm yarn will keep your ears and forehead warm and the knit will be attractive. As far as crochet projects go, a single band might not be on the farthest difficultly level, but actually the braiding part can be tricky. This one in the pictures (at top and below in the article) was by the hand of Jess at Chaleurlife.
Jess set up 4 patterns for this headband actually, for different size heads and different head needs. There’s an adult one, which is 3.5 inches wide and 20 inches in diameter (unstretched). Also for adults, an earwarmer 4 inches wide (at the widest part of the band) and also 20 inches around. The childrends’ headband is half the width — 1.5 inches wide (at the widest) and 17 around, and the kids’ earwarmer is 2.75 inches wide and 17 inches around. For every 2 inches, about 6 rows by 7 stitches in half double stitch are used.
She put together a pattern for everyone else who might want to try it out. The equipment you’ll need for this braided crochet headband:
- “I” size 5.5 mm crochet hook,
- worsted weight yarn of 77 or less yards,
- and a needle.
Two stitches are used: the chain and the half double crochet.
If you need to learn the half double crochet foundation row (or chain), there’s a tutorial for that created by the same crocheter, Jess.

HOW this headband works — conceptual level. This is one of the most interesting parts of this crochet pattern Jess came up with. It’s like a ribbon — a long (well, 20 or 17 inches) flat crochet fabric. On each end it’s all of a piece, but between the ends, the ribbon is split into 3 ribbons.
Then, while the two ends are still one piece, the 3 ribbons are braided over each other. This works because the big ends get tucked into the holes between the 3 ribbons, kind of like tying a knot, over and over until the braid looks correct.
Here’s the pattern by Jess at Chaleurlife.