 " >
" >
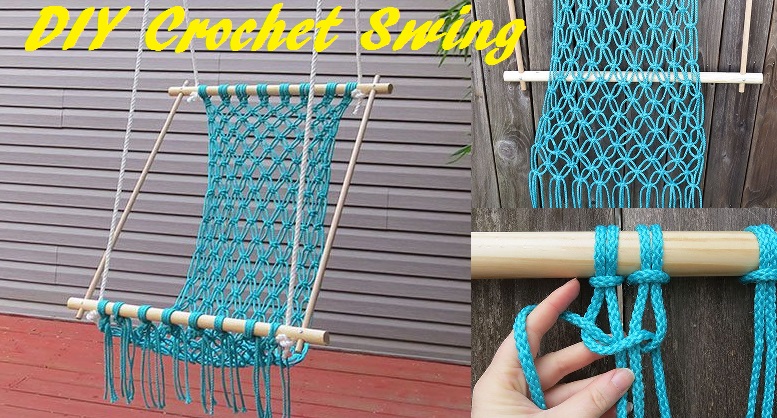
Summer is approaching, and with it there are so many outdoor fun activities that we can do like biking, camping, attending art classes, playing court sports, golfing, hiking, horseback riding, picnicking, retreat, rock climbing and of course, the most common activity during summer swimming. Does this sound expensive? Well, you can still enjoy the summer and not spend too much. Try to make a hammock from a scratch DIY. A hammock is a sling normally consisting of one or more cloth panels, a woven network of twine or thin rope. A hammock is useful especially during summer. If you want to breath fresh air while sleeping under a tree, then it’s the solution to your desire. Be guided by the tools needed and the proper ways on how to make one as per combined research.
Tools:
2 metal rings 2 to 3 inches in diameter
2 hardwood support bars measuring 1-1/2-by-1-1/2-by-33 inches each
1 netting shuttle
600 feet of rope should be sufficient
Tape measure
Scissors
Directions:
Step 1. Cut a 20-feet long length of rope for 24 strands.
Step 2. Knot its end together leaving about one foot of rope ends hanging from the top of your knot.
Step 3. Leave two feet of space between the larger knot you’ve just made.
Step 4. Wind netting shuttle full of twine and tie the free end of the shuttle cord to the starter loop, using an overhand knot. Repeat it again and so on.
Step 5. Take the gauge stick in your left hand and place it behind the shuttle cord, right up against the starter loop.
Step 6. Draw the shuttle up in back of the stick, pass it through the starter loop, then bring it back down in front of the stick.
Step 7. Pull the twine taut, and pinch it against the stick with your left thumb to hold it in place.
Step 8. Now, pull the twine down in front of the gauge stick, letting go with your left thumb and tightening the half hitch as you do so.
Step 9. To begin the end make a pair of three-cord braids. Tie the three ends together with an overhand knot, braid the cords, and thread the untied ends through the outside hole in one hardwood bar.
Step 10. Make a loose knot in the end of the braid and weave it in all out through the outer meshes of the net.
Step 11. Undo the loose knot, thread the braid through the outside hole of the bar at the other end of the hammock, and make a tight overhand knot to hold it in place. Repeat this process on the other side.
Step 12. Look for a comfortable place where you want to hang the hammock. Attach it’s ends to two trees. Have a happy and enjoyable rest time!