" >
" >
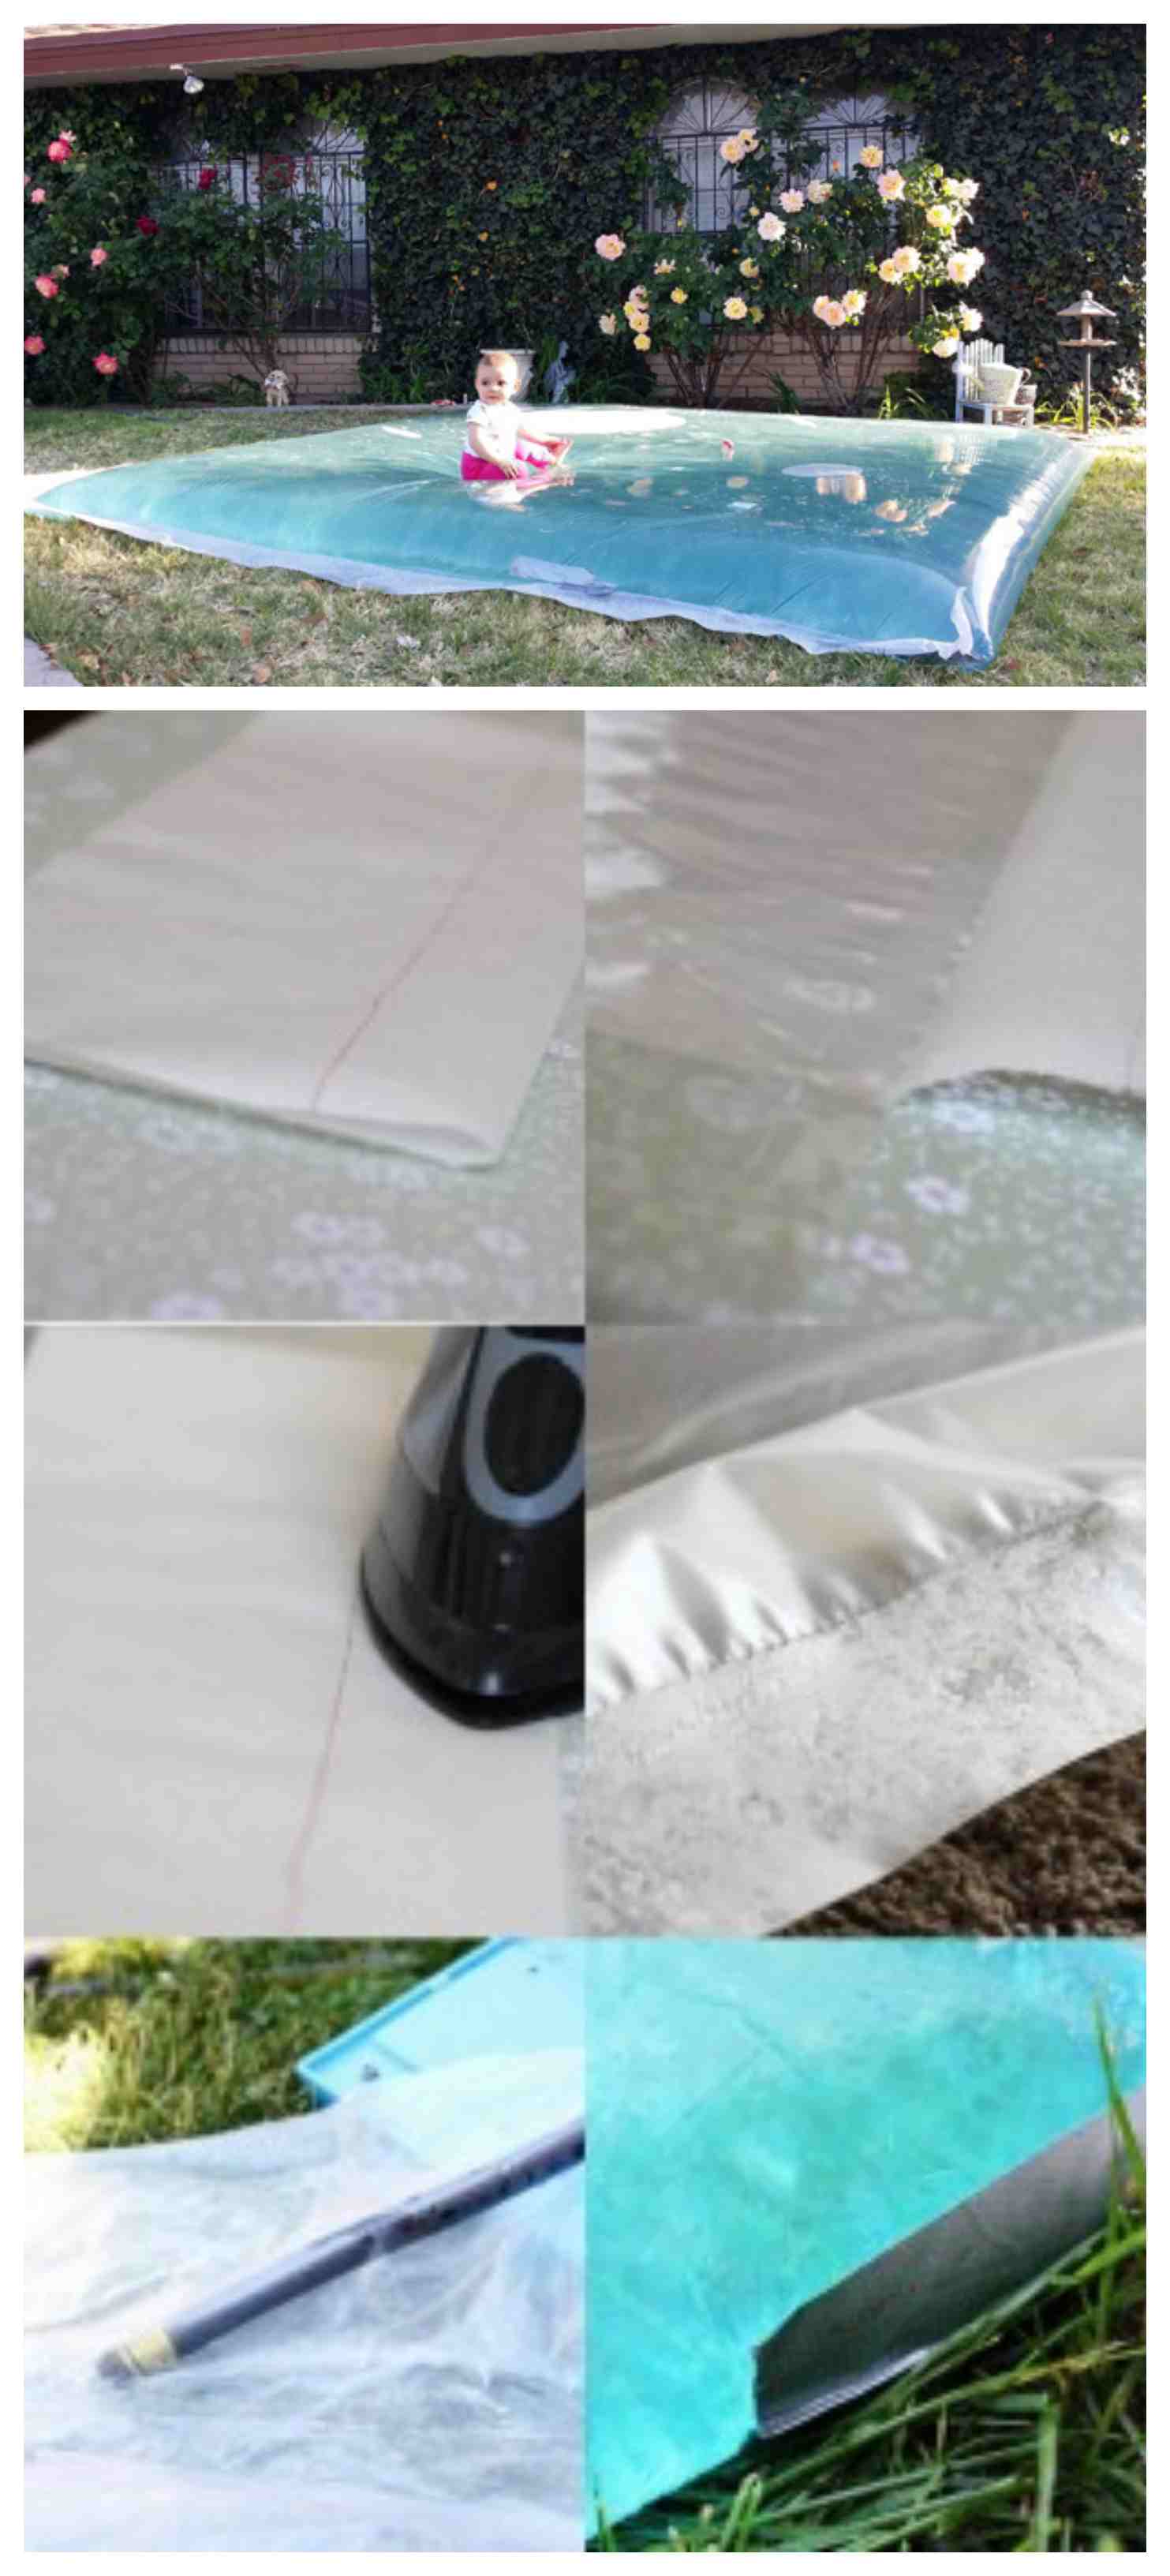
This is how to make a leak proof water blob (without tape). Want to make one of these for yourself? Look like a fun way to keep kids entertained in one spot for a couple hours at a time? “It’s been sitting in our yard for 3 days now, with NO leaks–at all. And it only took about 20 minutes to get ready!” said the designer of this leak-proof water blob.
This blob is made by literally melting the ends of poly (painter’s plastic sheets) together with a hot iron. The melted plastic ends create a leak-proof balloon that can be filled with water. It takes little time. “I was done before ‘I Feel Better’ started playing on Doc McStuffins. For those of you without toddler girls, that translates to about 15 minutes,” said a blob maker.
How to build this creation: Heat up your iron (highest setting). It may be easiest to lay your ironing board flat on the ground (not up on its legs), because the plastic weighs a lot. It may even be easier to slide the ironing board along the floor rather than moving the plastic along the ironing board.
Do this in your biggest room: Fold the plastic sheet in half. You may need to modify the total size of the sheet if you want it smaller. When you fold it over, the edges should be lined up. They will also align themselves somewhat as you iron them together.
For starters, you need:
– An IRON and ironing board
– a sheet of plastic (poly or painters sheet). Any size, but the photos are of a 10×25 roll cut down to 10×20. THICKNESS: 4 Mil.
– parchment paper (recommended: cut to approx. 2-ft long)
OPTIONAL: duct tape (to seal the hose hole)
Do this:
PLASTIC – roll it out in a big room, and fold it in half (to the size you want).
IRON – highest setting. You might want to keep the ironing board flat on the floor (stability). You may want to slide the ironing board across the floor rather than moving the plastic, even.
PARCHMENT PAPER – this is your measure. It shows you how far to iron into the plastic. You lay it under the edge of the plastic and iron that far up.
IRON the plastic that far up. Don’t iron too much (don’t melt the plastic too much). You can always re-iron (re-melt) the plastic if it isn’t enough. Don’t press too hard (but press firmly). The plastic will stretch when hot.
Let the plastic cool a few seconds and remove the parchment.
GO ALL THE WAY AROUND, but you don’t need to iron the folded edge–it’s already connected.
Cut a small hole in the folded part of the plastic. Place the hose in, and prop up the corner (so water doesn’t drain out). Fill it with water (can take half an hour). Add food coloring if you want. Seal hole with duct tape (or use iron to melt).